Selling
What a buyer sees when they buy a photo
Buyers get an account whether they ask for one or not
Checkout does not require an account, but completing one creates a dormant account against the email the buyer paid with. They set a password later if they want it, and the receipt works on its own either way.
Signed in, a buyer gets a dashboard with five tabs: Purchases, Favorites, Collections, Carts and Account. Purchases is the one that matters to you, because it is where they re-download.
Favorites and collections
A buyer can heart photos while browsing and group them into named collections. A collection can be shared with a link, and the person opening it sees the photos and nothing else: no prices, no cart, no download button, and no sign of who made it. Coaches and athletes use it as a shortlist.
What you control after the sale
You do not manage buyer accounts, and you cannot see a buyer's favorites or collections. What you control is the entitlement, from Org Dashboard → Sales: extend a download window by 30 days, revoke access, or restore it. Revoking does not consume the buyer's remaining downloads, so restoring puts them back where they were.
Download Store
Sell photo downloads directly from your galleries via Stripe. Set license terms, configure price tiers, and manage sales, GalleryID takes zero commission.
Stripe Connect Setup
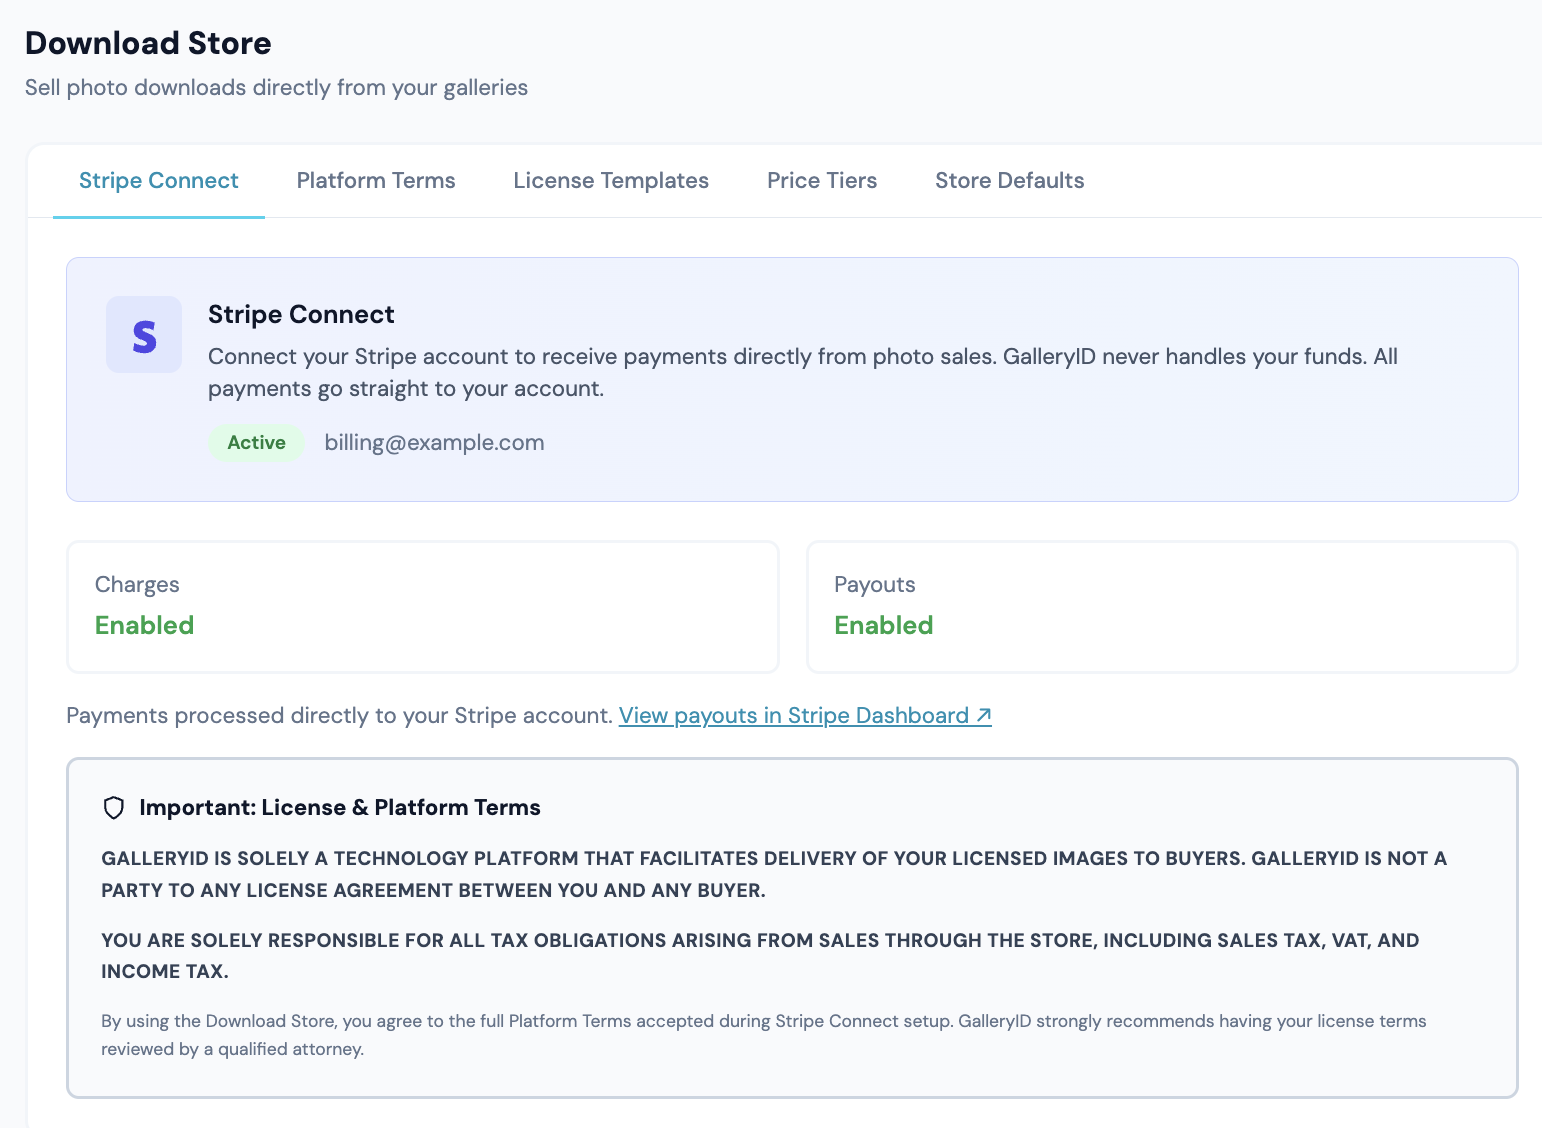
The Download Store uses Stripe Connect to process payments. Funds go directly to your Stripe account with no GalleryID commission.
Connecting Your Stripe Account
- 1
Open Org Dashboard
Navigate to Org Dashboard and select the Store tab. - 2
Click Connect Stripe Account
On the Stripe Connect section, click the connect button. You will be redirected to Stripe to complete onboarding. - 3
Complete Stripe onboarding
Follow the Stripe prompts to set up your business profile, bank account, and identity verification. - 4
Return to GalleryID
After completing onboarding, you are redirected back. The status card updates to show your connection status.
Connection Status
| Status | Meaning |
|---|---|
| Active | Charges and payouts are both enabled. Your store is ready to accept payments. |
| Pending | Stripe is reviewing your account. This usually takes a few minutes but can take up to 24 hours. |
| Incomplete | Stripe onboarding was started but not finished. Click Continue Setup to resume. |
| Not Connected | No Stripe account has been linked yet. |
Platform Terms
Before you can enable the store on any gallery, you must accept the GalleryID Download Store Platform Terms. Open the Platform Terms section in the Store tab, scroll through the full terms, check the acceptance box, and click Accept. Your acceptance date and terms version are recorded.
License Templates
License templates define what buyers can and cannot do with the photos they purchase. GalleryID provides three default templates. You can customize the text, upload your own PDF, or use the defaults as-is.
| License Type | Permitted Use | Key Restrictions |
|---|---|---|
| Personal | Social media, personal prints, gifts | Non-commercial only. No resale, no advertising. |
| Editorial | News, education, commentary, journalism | Requires photo credit. No advertising or endorsement. |
| Commercial | Advertising, marketing, merchandise, product packaging | Full commercial rights. Model release may be required. |
Customizing Templates
Open the License Templates section in the Store tab. Each template shows a card with its name, source badge, and a text preview.
- •Customize text: click Customize to open a text editor where you can modify the license terms. A character counter tracks the length.
- •Upload your own PDF: click Upload Own to drag and drop a PDF file (5 MB max). The uploaded PDF replaces the default text entirely.
- •Reset to default: if you have customized a template, click Reset to Default to revert to the GalleryID default text.
License Settings
- •Governing law: select the US state whose laws govern your license agreements.
- •Require credit line: toggle this on to require buyers to credit you when using the photo. Enter the credit text (e.g., "Photo by John Smith Photography").
Price Tiers
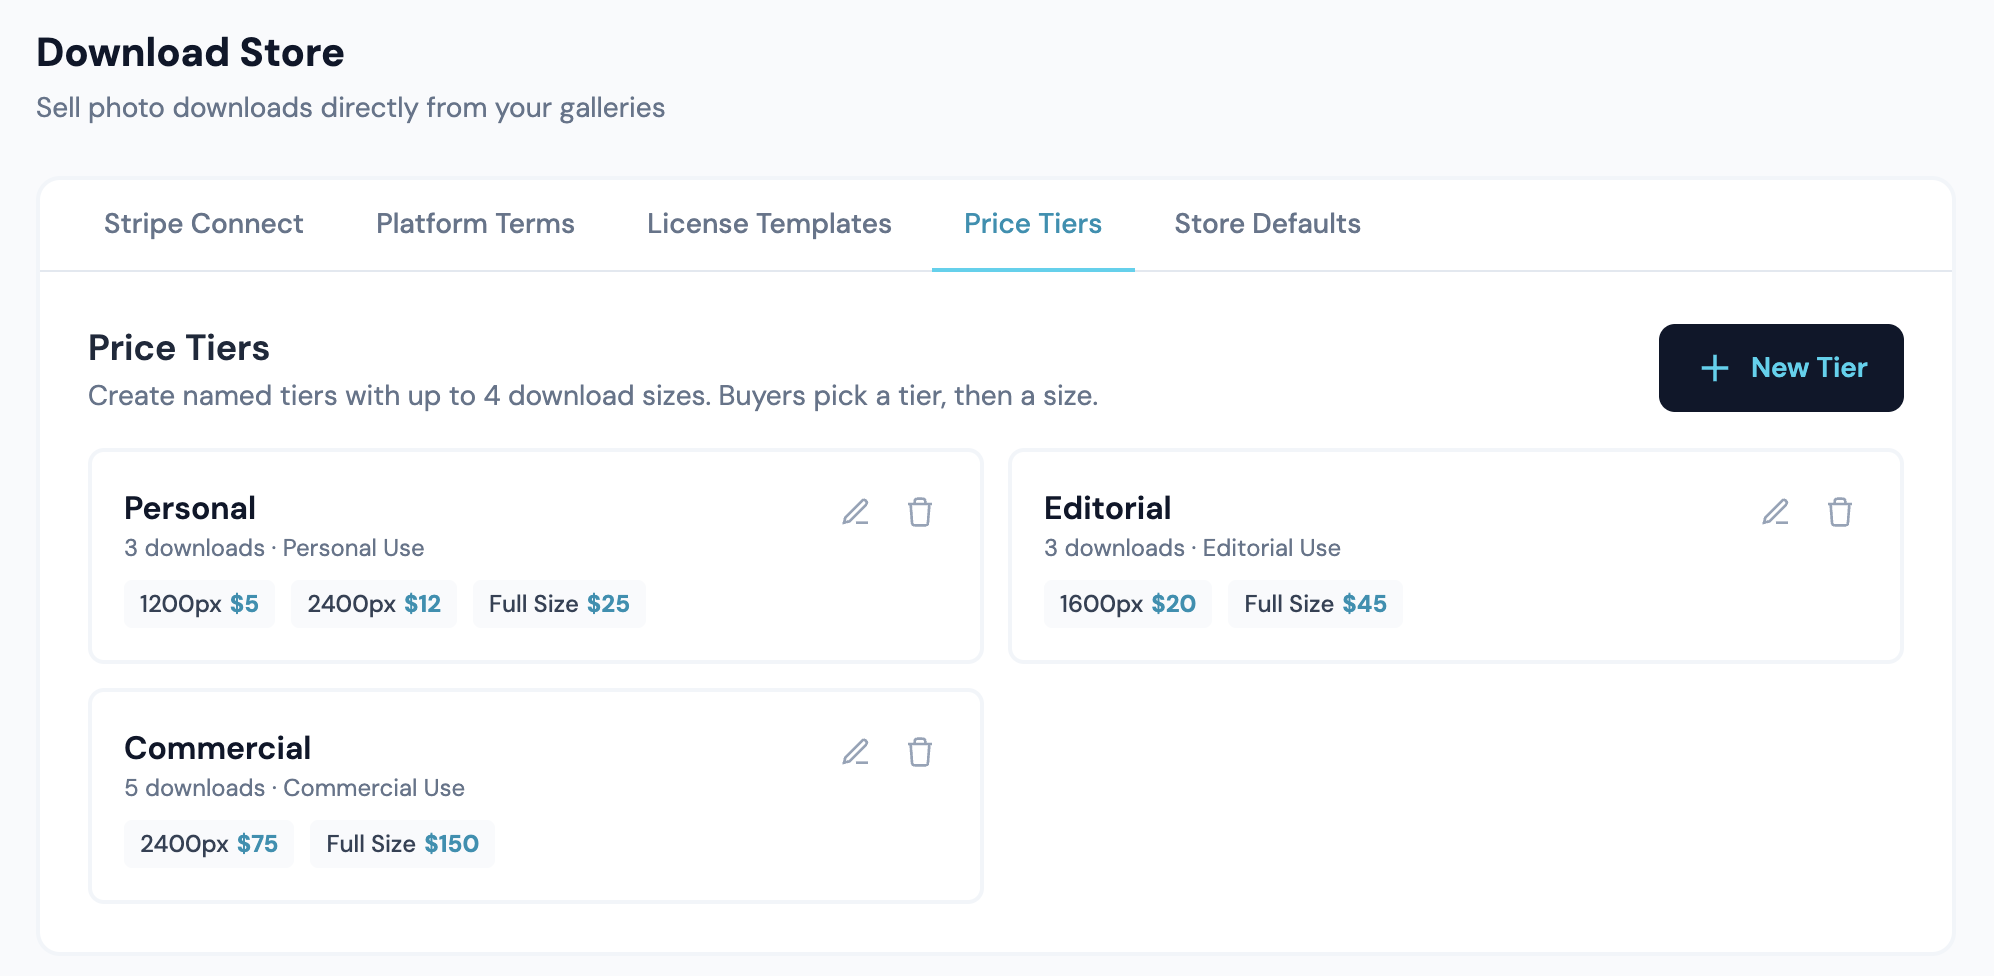
Price tiers define what buyers pay for each photo size. You can create multiple tiers, for example, a "Standard" tier for personal use and a "Premium" tier for commercial use, each with different prices and license types.
Creating a Price Tier
- 1
Open Price Tiers
In the Store tab, go to the Price Tiers section and click New Tier. - 2
Name the tier
Enter a name (e.g., "Standard", "Premium", "Media"). - 3
Select a license type
Choose which license template (Personal, Editorial, or Commercial) applies to purchases made through this tier. - 4
Set prices per size
Enter a price for each resolution you want to offer. Leave a size blank to disable it for this tier. At least one size must have a price. - 5
Set max downloads
The number of times a buyer can download the file after purchase. Default is 3. Range is 1 to 100. - 6
Save
Click Create Price Tier to save.
Resolution Sizes
| Size | Best For |
|---|---|
| 1200px | Social media, email, standard web use |
| 1600px | Larger web use, slideshows, small prints |
| 2400px | High-quality web publishing, large prints |
| Full Size | Original resolution, archiving, large-format printing |
Editing and Deleting Tiers
Each tier card shows the tier name, license type, size prices, and max downloads. Click the edit icon to modify settings, or the delete icon to remove the tier. Deleting a tier does not affect existing purchases made through it.
Enabling the Store on a Gallery
Each gallery has two independent sales paths you can turn on separately: individual photo purchases (buyer picks specific shots, per-tier pricing) and gallery bundle purchases (one price for the entire gallery). Enable either, both, or neither per gallery.
- 1
Open gallery settings
Right-click a gallery in the Gallery Browser and select Settings, then go to the Store tab. - 2
Enable individual photo purchases (optional)
Toggle Enable individual photo purchases on. A list of your price tiers appears, check the tiers you want available for this gallery. Each tier card shows its name, size prices, and max downloads. - 3
Enable gallery bundle purchases (optional)
Toggle Enable gallery bundle purchases on. The bundle pricing fields appear. By default the gallery inherits your organization's bundle defaults (price, delivery size, license, max downloads per photo) from Store → Bundle Defaults. Switch to Customto override any of those values per gallery. - 4
Save
Save your gallery settings. The gallery automatically becomes store-enabled when either toggle is on. Buyers will see only the purchase options you've enabled.
Setting Bundle Defaults Organization-Wide
Set defaults once in Store → Bundle Defaults and each new gallery inherits them. Defaults include:
- •Default enabled state (turns bundle on automatically for new galleries when set to true)
- •Default price (in dollars)
- •Default license template (Personal / Editorial / Commercial / custom)
- •Default delivery size (1200px, 1600px, 2400px, or Full Size)
- •Default max downloads per photo (1–100)
Individual galleries can override any of these in Gallery Settings → Store. Folder defaults also cascade, a folder with bundle enabled by default applies to all galleries created inside it.
Buyer Experience
Buyers can purchase photos without creating an account, guest checkout requires only an email address.
Checkout Flow
- 1
Browse a store-enabled gallery
Buyers open a gallery that has the store enabled. Photos show a purchase option. - 2
Select tier and size
The buyer picks a license tier (e.g., Personal, Editorial) then selects a resolution size. Prices are shown next to each size option. - 3
Add to cart
Selected photos go into a cart (up to 50 items). The cart shows a floating button with the item count. - 4
Review and checkout
In the cart, the buyer enters their email and reviews their selections. Above Checkout sits one button per license in the cart. Each opens the full license text, and the buyer has to scroll to the end and tick before it accepts. A commercial license adds a second tick covering liability. Checkout stays locked until each license in the cart is accepted, and what the buyer accepted is stored with the purchase. - 5
No license, no step
If none of the tiers in the cart carry a license template, there is nothing to accept and no button appears. The email alone unlocks Checkout. - 6
Pay via Stripe
The buyer is redirected to a Stripe Checkout page to enter payment details. After payment, they are redirected back to a success page.
After Purchase
- •The buyer sees a purchase confirmation page with a download link.
- •Download links are valid for 30 days and allow the number of downloads set by the price tier (default 3).
- •The download page shows the photo thumbnail, license name, resolution, and remaining download count.
- •Downloaded files include embedded XMP metadata with athlete names and photo details.
- •Buyers can also create an account to view their full purchase history and access download links from a dashboard.
Sales Dashboard
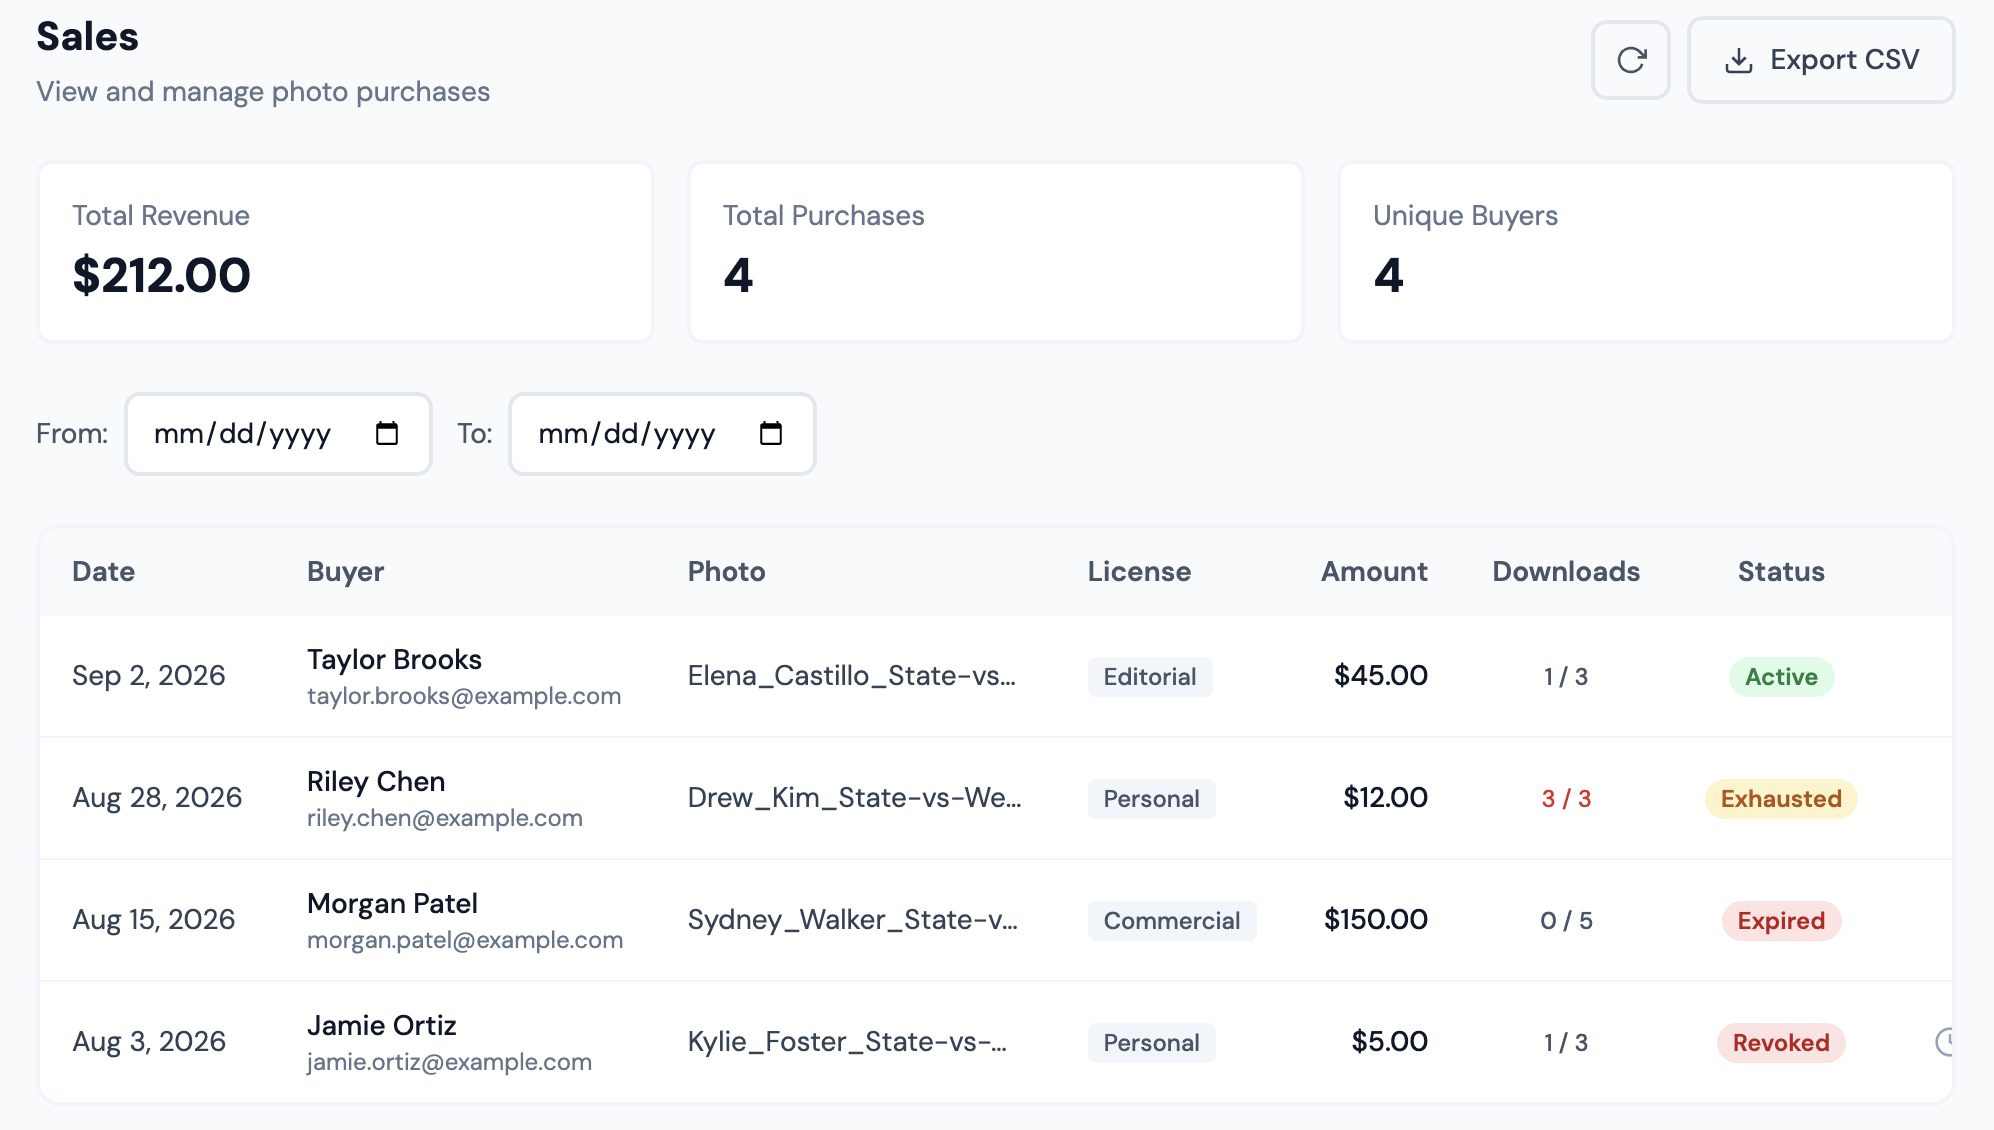
The Sales dashboard in your Org Dashboard shows all purchases, revenue stats, and per-purchase management tools.
Overview
The top of the dashboard shows three summary cards: Total Revenue, Total Purchases, and Unique Buyers. Use the date range filters to narrow the view.
Purchase Table
| Column | What It Shows |
|---|---|
| Date | When the purchase was made |
| Buyer | Buyer name and email address |
| Photo | Filename of the purchased photo |
| License | License type (Personal, Editorial, or Commercial) |
| Amount | Purchase price |
| Downloads | How many times the buyer has downloaded vs. the maximum allowed (e.g., 1/3) |
| Status | Active (green), Expired (amber, past 30 days), or Exhausted (red, all downloads used) |
Managing Purchases
| Action | What It Does |
|---|---|
| Extend | Adds 30 more days to the download expiration. Useful if a buyer contacts you after their link has expired. |
| Revoke | Removes download access. The buyer can no longer download the file through their link. |
Exporting Sales Data
Click Export CSV to download a spreadsheet of all purchases within the current date range. The CSV includes the date, buyer email, photo filename, license type, amount, download count, max downloads, expiration status, and Stripe transaction ID.
Troubleshooting
| Issue | What to Check |
|---|---|
| Store tab not visible in gallery settings | The store feature must be enabled for your account and you must have a connected Stripe account with charges enabled. Check Org Dashboard → Store → Stripe Connect. |
| Stripe status shows "Incomplete" | You started Stripe onboarding but did not finish. Click Continue Setup to complete the process with Stripe. |
| No price tiers available when enabling store | You need to create at least one price tier in Org Dashboard → Store → Price Tiers before you can enable the store on a gallery. |
| Buyer says download link expired | Download links expire after 30 days. Use the Extend action in the Sales dashboard to add 30 more days. |
| Buyer says "downloads exhausted" | The buyer has used all their allowed downloads (set by the price tier's Max Downloads). You can revoke the current purchase and manually send a new download link if needed. |
| Payment not showing in Stripe dashboard | Payments use Stripe Connect, they appear in your connected Stripe account, not the GalleryID platform account. |
| License terms need updating | Go to Org Dashboard → Store → License Templates. Customize the text or upload your own PDF. Changes apply to new purchases only, existing purchases retain the terms they were sold under. |
Related